Short answer: Clean and monitor caulk when it is stained but still firmly bonded. Repair a small, isolated gap only when the surrounding bead is sound and the sealant manufacturer permits adhesion to the existing cured product. Otherwise, remove and replace the bead. Full replacement is more appropriate when caulk is cracked, shrinking, peeling, soft, visibly growing beneath a lifted bead, or no longer bonded to either edge. Do not apply new caulk over moldy or loose material; the surface needs to be cleaned, dried, and prepared first.[1]
The right decision depends on four things: movement, adhesion, moisture, and the condition of the surface underneath. A neat-looking bead can still be failing if water or air is getting behind it.
The four-question caulk diagnosis
1. Is the caulk only discolored, or is it physically failing?
Surface staining, light soap film, or a small amount of mildew may be a cleaning problem rather than a replacement problem. If the bead remains continuous, flexible, and firmly attached along both edges, clean it according to the surface and product instructions, then watch for recurrence.
Replacement is more appropriate when you see a split through the bead, a visible gap at one edge, crumbling material, shrinkage, bubbles, or a section that pulls away easily. These signs indicate that the seal is no longer reliably bridging the joint.
2. Can you move the caulk without moving the surface?
Gently press the bead with a clean, dry fingertip or cotton swab. If the sealant feels rubbery but remains attached, it may still be working. If it lifts, peels, or slides away from the tub, tile, frame, or trim, it has an adhesion problem.
Adhesion failure often comes from contamination, old residue, moisture, incompatible products, or an unsound painted or finished surface. New sealant performs best on surfaces that are clean, dry, and free of old sealant, grease, dust, and other contaminants.[2]
3. Is moisture getting behind the joint?
Look beyond the caulk line. Soft drywall, swollen wood, peeling paint, a musty smell, staining, or recurring dampness suggests that the visible seam may not be the only problem. Bathroom water intrusion should be investigated promptly because moisture control is central to preventing mold and further damage.[1]
In a tub or shower, water disappearing into a seam is a signal to investigate the water source and the surrounding materials before replacing the caulk. A new bead may not address a plumbing leak, damaged substrate, or water entering elsewhere. Around a window or exterior door, water staining after rain, drafts, or damp trim can indicate a failed seal or a larger flashing, drainage, or installation issue. Caulk alone cannot correct missing or defective flashing around an opening.[5]
4. Is the joint supposed to move?
Caulk works best when it is matched to the joint. Interior trim and stationary gaps may tolerate a paintable acrylic-latex or siliconized product. Wet areas and joints exposed to repeated water generally need a waterproof kitchen-and-bath sealant. Exterior window and door joints need a weather-resistant product that can handle temperature changes and movement.
Caulk and weatherstripping serve different purposes: caulk is generally used around stationary components, while weatherstripping is used where a door or operable window moves. If the draft is coming through the moving edge of a door, replacing the caulk around the stationary frame may not solve it.
When to clean, spot-repair, or replace
| What you see | Best next step | Why |
|---|---|---|
| Light surface dirt or isolated staining; bead is continuous and bonded | Clean and monitor | The seal may still be intact. |
| One tiny pinhole or short gap; surrounding bead is firmly attached | Consider a small repair only if the product label permits bonding to the existing cured sealant | Otherwise, remove and replace the bead to avoid an adhesion failure. |
| Cracks, shrinkage, peeling, or multiple gaps | Remove and replace the full bead | Adding a patch over widespread failure leaves weak areas in place. |
| Visible growth under a lifted bead or growth that repeatedly returns | Clean, dry, inspect, then replace | Recurring moisture may be driving the growth. |
| Soft wood, swollen drywall, staining, or persistent dampness | Pause and investigate the source | A new surface bead could hide ongoing water damage. |
| Draft at an operable window or door edge | Inspect weatherstripping and alignment | The moving joint may not be a caulk problem. |
Surface-by-surface sealant selection
Bathtubs, showers, and sinks
Choose a product labeled for kitchen-and-bath use, waterproofing, and mold or mildew resistance. A 100% silicone sealant generally offers strong flexibility and water resistance, while some siliconized acrylic products offer easier cleanup or paintability. Follow the label for the specific tub, tile, acrylic, fiberglass, metal, or countertop surface.
Silicone is usually not paintable, so choose a paintable product only when the joint will be painted and the product label permits it. The sealant must also be compatible with the substrate; a product that adheres well to ceramic tile may not behave the same way on every plastic or finished surface.[2]
Interior window and door trim
For a stationary gap around painted trim, a paintable acrylic-latex or siliconized acrylic product can be practical. If the joint is exposed to water or significant seasonal movement, check the label for interior/exterior use, flexibility, and weather resistance rather than choosing a basic painter’s caulk by habit.
If the gap is between the frame and the rough opening—not merely between trim and wall—the repair may involve backer rod, low-expansion window-and-door foam, or caulk after the trim is removed. The Department of Energy identifies caulk, backer rod, and properly selected low-expansion foam as air-sealing options for window and door rough openings.[4]
Exterior windows and doors
Use an exterior-rated sealant with weather and UV resistance and enough flexibility for seasonal expansion and contraction. Exterior products are designed for exposure that interior-only caulks are not; product labels commonly distinguish interior, exterior, wet-area, and movement-related uses.[2]
Inspect the sill, corners, trim, and nearby siding or masonry—not just the most visible line. If water enters after rain, the problem may involve flashing or drainage. Fully integrated flashing helps direct water outward and protects vulnerable openings in the wall’s water-control layer.[5]
Removal checklist before you recaulk
- Confirm the source. Decide whether the problem is water, air, movement, contamination, or a damaged substrate.
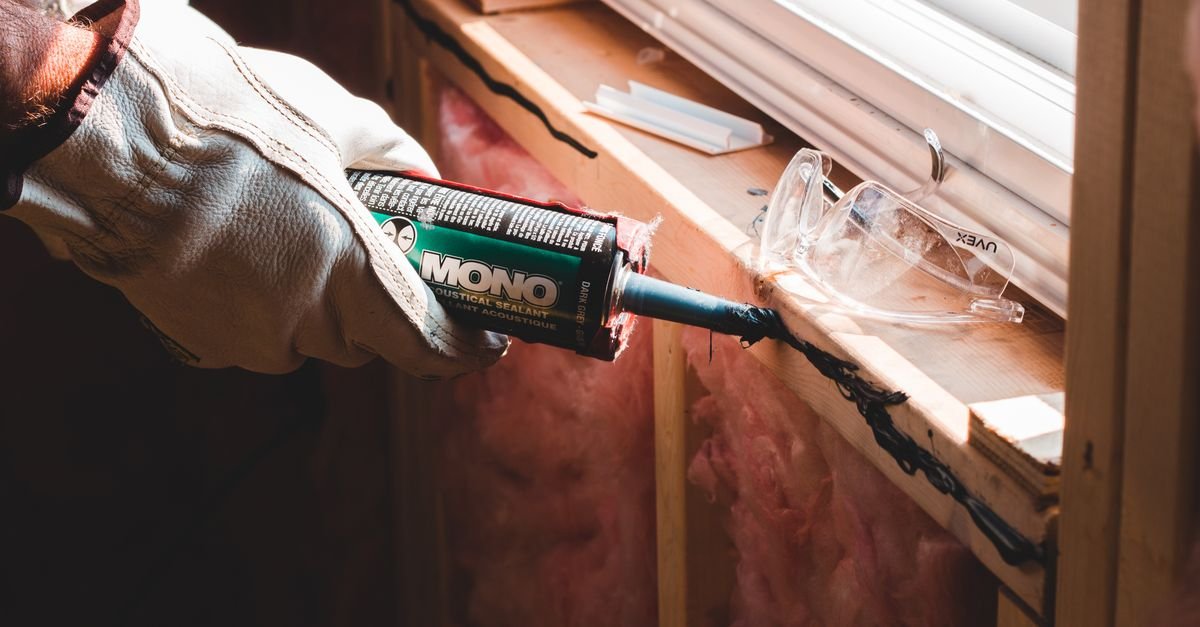
- Remove the old bead. Cut along both edges with care, then pull or scrape away the material without gouging the tub, tile, frame, or finished surface.
- Remove residue. Old sealant, soap film, oils, mold, and cleaner residue can interfere with adhesion. Use only a remover or solvent approved for the substrate, and test it in an inconspicuous area first.[2]
- Clean the underlying surface. For mold on a hard, nonporous surface, clean it and remove the moisture source. The EPA advises against painting or caulking over moldy surfaces.[1]
- Let everything dry completely. A damp joint can compromise the new seal.
- Check the joint width and backing. A deep or wide gap may need backer material rather than a thick mass of caulk. Follow the sealant manufacturer’s instructions.
- Match the new product to the surface and exposure. Confirm wet-area, exterior, paintable, movement, and substrate compatibility on the label.
A five-minute inspection routine
Walk through the bathroom and inspect every corner where tile, tub, wall, or fixture meets another surface. In each room with exterior openings, check the interior trim for drafts, staining, peeling paint, or a visible gap. Outside, inspect window and door corners after wet weather for failed beads, staining, or water tracks.
Record each location as clean, spot repair, full replacement, or investigate first. This prevents the common mistake of reca ulking the easiest visible seam while overlooking a moving joint, hidden leak, or damaged substrate.
For a broader seasonal walk-through, pair this check with the annual home inspection homeowners can do themselves. If bathroom humidity is contributing to recurring mildew, start with the moisture and ventilation checks in this bathroom guide.
When caulk is not the right fix
Stop and investigate before applying new sealant if you find persistent water, soft or swollen materials, active plumbing leakage, significant staining, a window or door that is out of square, or damage that extends beyond the joint. A new bead can improve appearance while leaving the source untouched.
For minor, dry, accessible joints, the diagnosis is usually straightforward: clean a sound bead, patch only a truly isolated defect when the product label permits adhesion to the existing cured sealant, and fully replace sealant that has lost adhesion or continuity. The durable repair comes from correcting the moisture or movement problem first, then choosing a compatible product and giving it a clean, dry surface.
Sources
- A Brief Guide to Mold, Moisture and Your Home — U.S. Environmental Protection Agency
- Technical Bulletin: Sealant Best Practices — Loctite
- Caulks & Sealants — DAP Products
- Rough Opening Flashing: Air Sealing — U.S. Department of Energy Building Science Education
- Fully Flashed Window and Door Openings — U.S. Department of Energy Building Science Education