The choice between weatherstripping, caulk, and expanding foam depends on whether the gap moves. Moving joints—where a door meets its frame or a window sash slides—need weatherstripping that compresses and rebounds. Stationary joints—where a window frame meets the wall—need caulk that bonds permanently. Hidden cavities need foam that expands to fill irregular spaces.
Find the Leaks Before You Buy Materials
Start with the leaks you can feel. On a cold, windy day, run the back of your hand slowly around window and door perimeters, electrical outlets, baseboards where floors meet exterior walls, and anywhere pipes or wires enter the house.[1] The worst leaks announce themselves immediately as cold drafts.
For leaks you cannot feel, the safest approach is a smoke-free visual check: hold a single-ply tissue or a thin strip of plastic near window edges, door frames, and outlet covers and watch for movement, or use an infrared thermometer to spot temperature differences along the same areas.[2] These methods find the same drafts as a flame test without introducing an open flame near curtains, trim, or other combustible materials. If you choose to use a candle or incense stick instead, keep it well away from curtains, paper, and other combustibles, never leave it unattended, keep a clear path to an exit, and avoid the test entirely near flammable finishes or if anyone in the home uses supplemental oxygen. Work methodically around each room's perimeter rather than jumping between areas.
Check these high-priority locations first:
- Where window and door frames meet walls or trim
- The threshold under exterior doors
- Movable window sashes that slide or tilt
- Electrical outlets and switch plates on exterior walls
- Where dryer vents, plumbing, or utility lines penetrate exterior walls
- Attic access hatches
- Mail slots and pet doors
Weatherstripping: For Moving Parts Only
Weatherstripping seals gaps that open and close repeatedly. It works for door edges, operable window sashes, and attic hatch perimeters—anywhere two surfaces meet and separate regularly.
Common weatherstripping types include adhesive-backed foam tape, V-strip (tension seal), door sweeps, and compression bulb seals. Foam tape generally costs less than other options, though how long it lasts depends on the product, traffic, and exposure, so check the manufacturer's guidance rather than assuming a fixed lifespan. V-strip metal or vinyl weatherstripping tends to hold up to higher traffic, which can make it a better choice for frequently used doors.
Install weatherstripping on clean, dry surfaces when temperatures are above 50°F. Adhesive bonds poorly to cold, dirty, or wet frames. Measure each opening before cutting—weatherstripping that is too short leaves gaps, while material that is too long bunches and prevents doors or windows from closing properly.
For exterior doors, add a door sweep to the bottom edge if you can see daylight underneath when the door is closed. The sweep should brush the threshold firmly without dragging or preventing the door from opening smoothly.
Caulk: For Stationary Joints
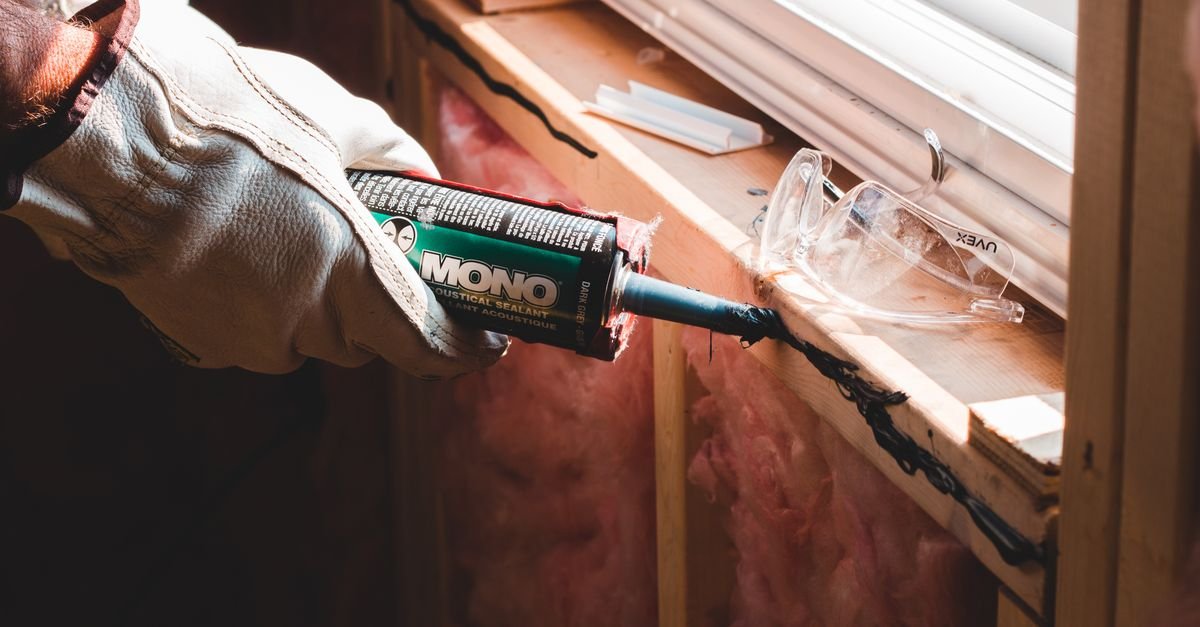
Caulk seals gaps that never move. Use it where window or door frames meet adjacent walls or trim, where siding or trim pieces join, and around any penetration through an exterior wall that will not flex or shift.[3]
For exterior applications and gaps exposed to temperature extremes, use silicone or siliconized acrylic latex caulk. Silicone generally offers more flexibility and durability against temperature swings and UV exposure than standard acrylic latex.[4] Acrylic latex caulk works well indoors and can be painted, making it the right choice when you need to match trim color.
How much caulk a project needs varies with the number and size of gaps, so buy an extra cartridge or two beyond your estimate rather than relying on a fixed per-opening amount.[5] A standard caulking gun and a few cartridges will typically handle an entire house's worth of windows.
Before applying new caulk, remove old, cracked, or peeling caulk with a putty knife or utility knife. Clean the joint with rubbing alcohol to remove dirt and oils. Cut the caulk tube nozzle at a 45-degree angle to create a bead size slightly larger than the gap width. Apply steady pressure while moving the gun smoothly along the joint, then smooth the bead with a wet finger or caulk tool within a few minutes before it skins over.
If you are unsure whether existing caulk around windows needs replacement, look for gaps, cracks, or areas where the caulk has pulled away from the frame—signs covered in our guide on when failing caulk means you should recaulk or address bigger problems.
Expanding Foam: For Large Gaps and Hidden Cavities
Expanding foam fills irregular gaps larger than one-quarter inch and reaches into cavities where caulk cannot flow. Use it around window and door frames where they meet rough framing inside the wall, around pipe and wire penetrations, and in rim joist areas where floor framing meets foundation walls.
Expanding foam has important limits. Never spray foam inside an electrical outlet, switch, or junction box, or directly onto wiring—it can trap heat and interfere with the box's intended function. Do not use foam to block combustion air inlets, dryer vents, bath or kitchen exhaust vents, or weep and drainage openings designed to let water escape, since blocking these can cause moisture damage or unsafe appliance operation. Standard foam is not a substitute for a listed fire-rated sealant at fire-rated wall or floor penetrations (around chimneys, between units, or at other fire-separation assemblies); use a product specifically labeled for that purpose in those locations. Avoid foaming directly against operable window and door frames in a way that restricts their movement, since foam pressure can bow frames and prevent proper closing.
Choose low-expansion foam for window and door frames. High-expansion foam generates enough pressure to bow window frames and prevent doors from closing. Low-expansion formulations fill the gap without distorting surrounding materials.
Apply foam in layers if the gap is deep. Foam cures from the outside in, and thick applications may leave uncured foam in the center. Fill half the depth, let it cure for the time specified on the can, then add more if needed. Trim cured foam flush with surrounding surfaces using a utility knife, then cover it with caulk or paint—foam degrades when exposed to UV light.
Expanding foam is messy and bonds aggressively to skin, clothing, and tools. Wear disposable gloves and have rags and foam cleaner available before you start. Once foam cures, only mechanical removal works.
Interior Air Leaks You Cannot See
Electrical outlets and switch plates on exterior walls leak more air than most homeowners expect, but removing a cover plate means working near live wiring. Before removing any outlet or switch cover, turn off the correct breaker at your home's electrical panel, then verify the circuit is actually off using a non-contact voltage tester or by confirming the outlet no longer powers a lamp or tester plugged into it. Do not work on an outlet or switch if you notice damaged, discolored, or exposed wiring, a loose or warm cover plate, or a burning smell; call a licensed electrician instead. Once you have confirmed the power is off, remove the cover plate and you will often feel cold air flowing around the device box. Install foam gaskets designed to fit behind outlet and switch covers—these thin foam rectangles cost under a dollar each and install in seconds without tools, and they do not require touching any wiring.
Attic access hatches and pull-down stairs frequently lack weatherstripping, allowing conditioned air to escape into unconditioned attic space. Add adhesive-backed weatherstripping around the hatch perimeter and consider building an insulated box over the hatch opening in the attic. This approach addresses both air sealing and insulation, two separate but related issues covered in our article on whether your attic needs more insulation or better air sealing.
What This Project Costs and Saves
Material needs vary by home, but a comprehensive air-sealing project for a typical house often involves several tubes of caulk, weatherstripping for a handful of doors, one or more cans of low-expansion foam, and a set of outlet gaskets. As a rough, illustrative estimate, many homeowners spend somewhere in the range of several dozen to around a hundred dollars on materials, though your actual cost will depend on your home's size, the number and size of leaks, and local prices. The work itself can often be completed over a weekend, but larger or older homes with more leaks may take longer.
Comfort improvements and energy savings from air sealing vary significantly by home and climate, and cannot be guaranteed. Some homeowners notice fewer drafts fairly quickly, while measurable changes in heating or cooling bills depend on how leaky the home was beforehand, local energy costs, weather during the billing period, and other factors unrelated to air sealing. Treat any savings as a possible benefit rather than an expected or guaranteed result.
Before You Seal: Combustion Appliances and Ventilation
If your home has a fireplace, wood stove, gas furnace, boiler, water heater, or other fuel-burning appliance, extensive air sealing can change how much air is available for combustion and for safely venting exhaust gases. Sealing a home more tightly without addressing this can, in some cases, contribute to backdrafting or inadequate combustion air. Before undertaking a whole-house air-sealing project in a home with combustion appliances, have a qualified contractor or energy auditor assess combustion safety and ventilation needs; this is especially important if you plan to seal many leaks at once rather than a single door or window.
When Air Sealing Causes Condensation
Aggressive air sealing sometimes creates new problems. Homes need controlled ventilation to remove moisture from cooking, showering, and breathing. If you seal a home very tightly without addressing ventilation, indoor humidity can rise enough to cause condensation on windows, particularly in cold weather.
If you notice increased condensation after sealing air leaks, you have likely reduced air exchange below what your home needs for moisture control. Run bathroom exhaust fans longer after showers, use kitchen range hoods when cooking, and consider cracking a window briefly each day to exchange stale indoor air for fresh outdoor air. Persistent condensation problems require more investigation, as outlined in our article on why windows get wet inside and how to stop it.
The Order That Makes the Work Easier
Tackle air sealing in order of impact and difficulty. Start with the leaks you can reach easily and feel strongly—exterior doors, accessible windows, and obvious gaps. These are often the most noticeable improvements and help you build confidence with the materials and techniques.
Move to less obvious leaks next: outlet covers (with the power-off precautions above), door thresholds that need adjustment, and window sashes that need fresh weatherstripping. Finish with foam application around penetrations and in hidden areas, since foam work requires more care, carries the limitations noted above, and creates more mess.
Work on mild-weather days when you can open windows and doors for extended periods without discomfort. Caulk and foam cure better at moderate temperatures, and you will appreciate fresh air ventilation while working with these materials indoors.
Air sealing can reduce drafts and uneven temperatures between rooms, which many homeowners find makes a home more comfortable to live in day to day. Any effect on insect or pest entry, or on the service life of heating and cooling equipment, has not been established here and should not be assumed; focus on the direct, observable benefits of fewer drafts and more even temperatures.
Sources
- How to Seal Windows for Winter and Stop Drafts — Build & Construct
- How to Find and Seal a Window Air Leak — Park Heights Roofing
- How to Seal Doors and Windows for Energy Efficiency — EngineerFix
- How to Insulate Windows and Doors for Energy Efficiency — EngineerFix
- DIY Guide: Sealing Air Leaks — Durham County Government
- How to Find and Fix Drafts — Whole House Fan